Difference between revisions of "Running a Job"
| Line 1: | Line 1: | ||
Select the Start Job tool button [[Image:20090406 Start Job Button.gif]] to initiate an analysis job. | Select the Start Job tool button [[Image:20090406 Start Job Button.gif]] to initiate an analysis job. | ||
You find the Job Button in the Icon menu. | You find the Job Button in the Icon menu at the top of the window. [[Image:20090406 Start Job Button Location.gif]] | ||
This will bring up the start job dialog: | |||
[[Image:20090406 Start Job Dialog.gif|300px]] | |||
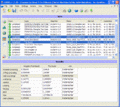
Enter a name for the job and press Ok. This will bring up the Job view with the new job shown at the top of Job List. | Enter a name for the job and press Ok. This will bring up the Job view with the new job shown at the top of Job List. | ||
Latest revision as of 22:21, 6 April 2009
Select the Start Job tool button ![]() to initiate an analysis job.
to initiate an analysis job.
You find the Job Button in the Icon menu at the top of the window. 
This will bring up the start job dialog:

Enter a name for the job and press Ok. This will bring up the Job view with the new job shown at the top of Job List.
The Job will be in the “Executing” state. Wait for the job to go to the “Completed” state.
If the user selects a job (also a job that currently is executing) the result of the analysis will be displayed in the lower Result part of the Job View Window.
If an executing job is selected the results of the analysis will continuously be updated. Several jobs can be selected by holding down the ctrl key while clicking on each job. This makes comparing different versions of a particular model easier.
Compairing multiple results in Job View
